


How we did it
 Yeah, I really just wanted to see the before and after in the same post. But for those of you *cough*Amanda*cough* who might want to know a few more details about how this first vanity became the second vanity, here ya go!
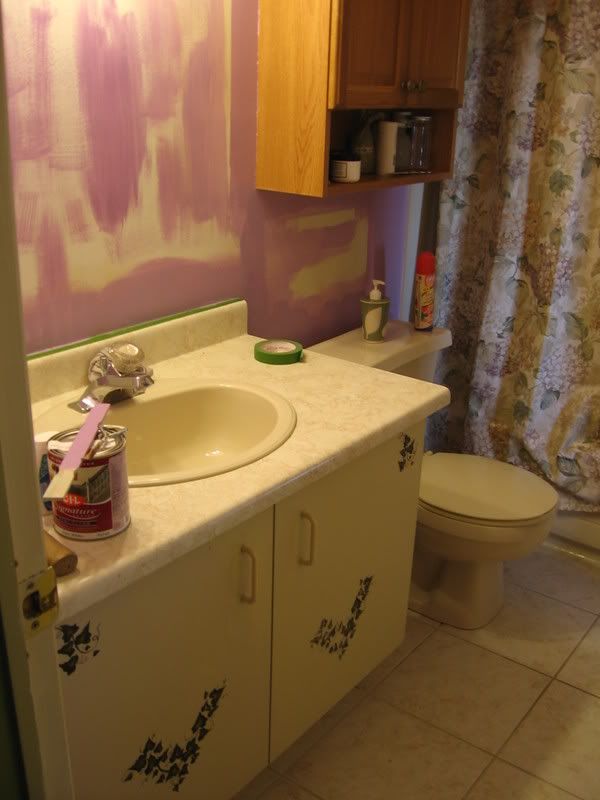
As I mentioned earlier, the vanity is one of those melamine monstrosities that turn up in so many apartments and townhouses. The previous owners had stenciled them with the leaves you can see in the first picture. Not bad, but really not our style. We took off the doors and sanded them first. Then we cleaned them with TSP, which is very toxic, so be sure to use gloves! Then we sanded again with finer grade sandpaper. Once the doors were smooth and clean, we attached moulding to the edges (Well, I should say...Grant attached it!) Then we primed the doors using a alkyd primer. We did the same to the side of the vanity.
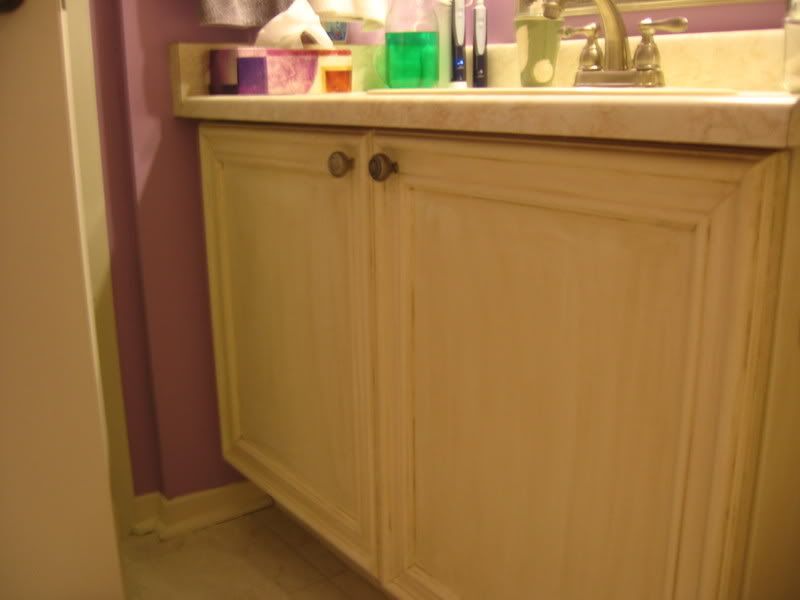 The first coat of the paint was a creamy white melamine paint by CIL called Baker's White. You can use any oil-based paint, but this paint was very easy to use. We put on two coats of the cream base. Then I mixed one part of CIL's Huron Grey (also melamine paint) with 3 parts of glaze. We applied this with a brush and then wiped it off with a rag. The wiping leaves colour in the cracks of the moulding and leaves a slight streak on the flat surfaces. I think if you only want the colour on the moulding you would just paint that. This is the simplest kind of a patina finish. You can also use a dry brush technique to apply the second colour- that gives more of the effect of the paint wearing away. Then we reattached the doors and added new hardware.
We are quite pleased with the transformation. Grant isn't one hundred percent sold on the patina finish-- he thinks it makes the cabinet look dirty and he hates that he worked so hard to make the moulding fit and the patina shows all the cracks! But I am happy with the patina look and I love the mouldings. We have decided that we can do something similar in the kitchen, which will be an ENORMOUS undertaking. Still, we think we can save at least $1000 by going this route, so it will be well worth it.
Labels: Creative pursuits, Home Work
posted by allison | 6:49 PM
![]()
![]()
3 Comments:
I really like patina finishes. The same "kind" of technique can be used on the soldering joiny section of stain-glass.
That doesn't sound too horribly difficult. Time-consuming, maybe, but not difficult.
Do you think if he'd used some kind of wood filling in the molding cracks, it would have turned out just as well?
Amanda- before we did the patina coat, the mouldings lookd beautiful, not a crack to be seen ( Grant is a bit obsessive about stuff like that), so we didn't use any wood putty. But the patina soaks into those cracks and ridges the naked eye doesn't really notice.I like the look- it gives an extra 3-D aspect to the mouldings that I find more interesting than just plain paint. Grant thinks he would have liked to keep the pretty plain painted cabinets. I will probably indulge him with the kitchen.
And the painting part is dead easy. I couldn't have done the mouldings to save my life--I am not a detail person, but anyone with a good saw and patience could probably do a bang up job on it!
Post a Comment
<< Home